The start of many thing's to come...

Basically decided to create this blog to keep a record of all my University work neatly and tidily in one place! Currently studying at Staffordshire University (Stafford Campus) doing a Computer Games Design Degree! So this blog will mainly consist of many 3D artwork and maybe some of my programming work from previous years.

Feel free to comment or suggest anything and be honest. Bad feedback is better than no feedback!

Friday 7 April 2017

3D Printing

So at work we had a bracket missing on one of the machines and was asked to model it so they could print it on their 3d printer.

The model was fairly simple but after printing a few problems arose that i thought would be good to mention for any one else modelling for 3d printers.

Below is the final model.


Before this final version there was 2 errors one being my fault and another because the printer does something I was not aware of.

The first was when I added some loops to Chamfer some of the edges I some how reduced the size of the wing clips on the sides and never noticed the mistake before exporting.

The second and the one I wanted to share with you was when the printer prints out the model the base is squashed.
This means even though i set the entire model to 1mm thick the base ended up 0.5mm meaning it flexes a little too much.


This is some thing that definitely needs considering or checking before printing as it will cost time and money.  Too solve it i simply I made the base 2mm.

Thursday 16 March 2017

Game assets - Pirate ship placeholder

One of the levels we will be designing for The Forbidden Island will be based around Pirates and so one of the assets I have been tasked to create is a Pirate ship.

Still being new to Blender I decided a simple placeholder would suffice for now whilst I continue to learn.


Udemy Tutorials

To get a grasp on Blender, Udemy first teach you the Interface of blender and how to get around.  Eventually they start teaching you how to use primitive objects to create things and box modelling.

Below are a few examples of this.

A cube into a wedge


A cube into a periscope


The above gave the necessary skills like extrude, attach (join in blender), Weld (remove doubles in blender) and using the 3d cursor.

Next I had to take those skills learned to start creating a Mayan Pyramid.


This Tutorial added to further skills like Edge loops, and arrays.  I was then asked to go off and make some things using primitive objects and the skills learned of things around the house but to keep it simple.

So as per I went overboard.  I decided this would be a great opportunity to create some place holder game assets.

Section 4

The challenge for this section was to create a Low Poly Chess Board.


Blender and Udemy

So during this process of designing stuff for a game we decided that this game would eventually be published.  The problem with that is I am using a student version of 3ds max and looking at just a 1 year license would cost £1800.  Our budget is currently 0 pence so I needed to find a way.

Blender is free (Happy), but I have never used it and have only used 3ds max for my 3d work.  After downloading Blender and hoping my experience with 3ds max would help me navigate around did not pan out.

After trawling through YouTube I decided to pay for a course in blender on Udemy.com.  At only £10 I have access to exactly what I need to get me up to speed with blender and not waste lots of time simply searching for tutorials, obviously I am still going to use YouTube for tutorials but this course is helping massively.

At first I figured Udemy would be a waste of time as I already knew how to model I just needed to learn Blender but as I dived further in to Blender I realised that starting from scratch was not a bad idea as it is vastly different from the Autodesk suits.

Tuesday 28 February 2017

Oil Lamp - Game Asset

Started modelling assets for a game and needed to create a Oil lamp for our boy character to hold.  So far I have quickly modeled out a high poly lamp using splines with Lathe modifier, and some box modelling techniques.

I then quickly added some materials from the raytrace and mental ray materials in 3ds max for a quick test render


So I have spent the evening experimenting with particles and have managed to make a flame with smoke and sparks but 3ds max animation keeps freezing and the render don't seem great so I will wait until It's imported into Unity to see what its like before tweaking more.


I then added a Omni light and experimented with animating a flicker.


The render seemed a little bright and that is because I set the multiply to a crazy amount.  The next render is the same Omni with the same setting but I reanabled the sun light I created for previous renders which I hoped would drown out the glare some.


I decided the flicker was just too bright so I added 2 omni lights.  1 to keep a decent light distance so the player can see and one for the flicker at a much reduced brightness


A larger render with a longer animation


Next I have started to model the LP version of the lamp by copying the HP version and taking off Turbo smooth, deleting lots of unnecessary loops etc


So final LP Lamp is 344 polys.  time to unwrap.


Will Bake Hp to LP tonight and hopefully get some good results

Wednesday 8 February 2017

Low Poly Character

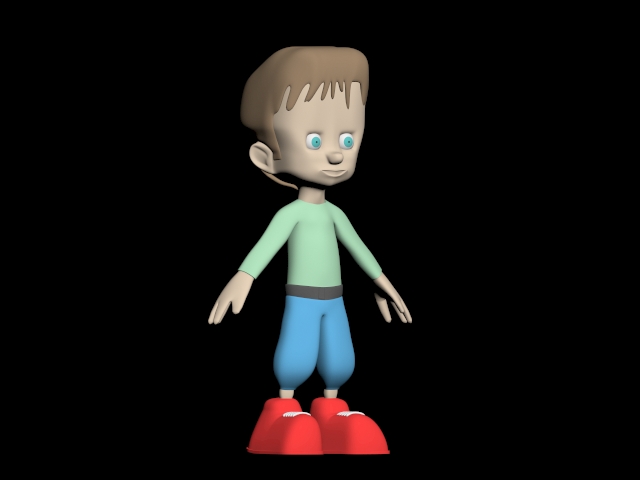
So today's task was to start modelling a Low poly character in a cartoon style that I could eventually rig and test out in Unity which is the engine were going to be using for our side scrolling game.


My Method was to start with a box for the body 2x2x2 segments and to use extrude to for the body and arms.  I then used extrude and bevel to creates the legs and shoes.

To model the head I again started with a box and put Turbosmooth on with 1 iteration.  This method is far better than using a sphere as spheres cause nasty triangles where as rounding out a box gives the head a much nicer set of quads.

Continued...

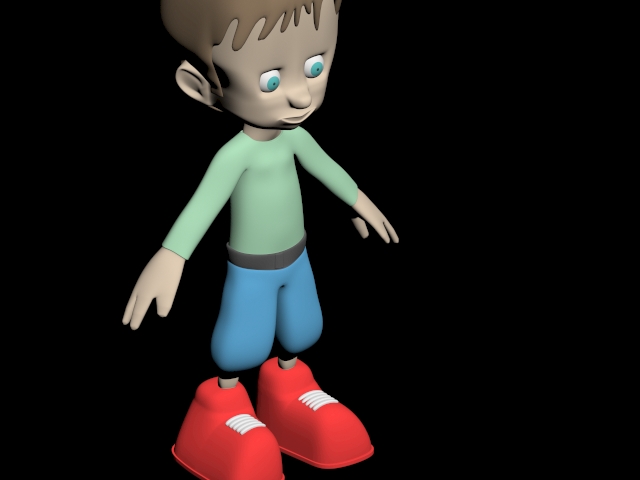
So I have completed the Model for now.  I may have to add some loops later for animation purposes but as we haven't yet decided on what were animating I have kept it as simple as I could and only detailed what would give the character a good silhouette and keeping in mind this is a side scrolling game some details would not be required.

I have managed to keep the character at 772 polys 1,544 Tris.


The hair is also apart of the model with like a Johnny Bravo style keeping it simple but I really liked the look during the design.

Next..

So next I am going to unwrap the model and texture it.  Hopefully I have learned from previous builds and get the UVW's right this time, fingers crossed.

Update..

So I have spent some time with the UV's trying to get them as best as I could using many different methods with the unwrap editor as I could to get them accurate.  This included Pelt Mapping with relax and peel mode mainly.


I did both a wire frame and solid version of the unwrap in a PNG format with alpha selected so I could easily overlay them in Photoshop.

I then started to add colour using Solid colour masks to help with any future alterations in which I can easily and quickly change the shade or colour of each part by changing the colour mask and not having to repaint the whole thing.


I have spotted a few errors in the characters hand which need to be fixed, again the problem is at UV level but after spending along time trying to sort the uv's on the hand previously I am ignoreing this for now.


Update..

So now I have painted some detail to the hair to make it less flat looking.


Next I have started adding some texture detail to the clothing


Next I have improved the shirt as the texture was going the wrong direction and added a logo.  Also added some front pockets to the jeans


Next I have decided to take a break from the diffuse for now and I have started building the HighPoly version.  This is so I can create a nice Normal map and complete map to add some extra detail to the Lowpoly.


Above shows how I started modelling the trousers and below I continue to add detail by completing the Shirt and some hair.


So now I am happy with my HighPoly I decide to revisit my UV's and fix all the issues/difficulties I found whilst making the diffuse earlier.  The new UVW unwrap below will enable me to get a much better diffuse once I bake the Highpoly onto the Lowpoly.


Happy with my Uv's I have now started putting a base colour on my high poly ready to start baking onto my Low poly using a projection modifier.  This will include Normal map and complete map.

Base Colour on Highpoly


Next I have started to bake a complete map and a normals map and the first set of results are pretty good.  Will need to clean up a few area but I think it will turn out good.


So yea he looks like a vampire and the shadows are a little harsh but that should be an easy fix.

Hi Poly To Low Poly Workflow

  During my research in making a character I came across a lot of people asking whether they should model low poly first the make high poly or vise versa.  
After completing my low poly first and then using that to create a high poly I did run into some problems as above, mainly the fact my high poly was a good size smaller.  This meant that when projecting my maps from the high poly to the low poly the cage had to be placed quite a distance away which meant the bake came with plenty of errors.

Taking my High poly boy I decided to work backwards and see what the results would look like.


The character is 100-200 higher in poly count than the original low poly but as you can see his silhouette is far closer to the high poly which means he should take the bake much better,

To show this I put the original low poly (left) high poly (Middle) and new low poly (Right) together